Changing a P38A Range Rover front air spring
Cold winter temperatures always seem to accelerate air spring leaks on both of our Range Rovers. I replaced the front air springs on one Rover last December, which was a great learning experience. This December's cold temperatures accelerated a leak that caused the Rover to be on the bump stops every morning. I raised the suspension to high and left a couple doors cracked over the weekend to determine that it was a right front air spring or line leaking. I rebuilt the valve block two years ago, so I was reasonably sure it was not the air line connection at the valve block. Some soapy water at the air line connection to the air spring did not reveal any bubbles, so I figured it was the air spring bladder like the other Rover previously. I thought this would be a good opportunity to practice changing it again, but I would use a minimal tools approach like I was on a trail. This procedure took less than 30 minutes per front air spring. My EAS was not in a fault mode, so raising the vehicle and pressurizing the new spring were easier than using the manual jumper method.
tools
- LR RR bottle jack
- 2x4 6" wood
- jack stands or 4x4 6" wood for safety
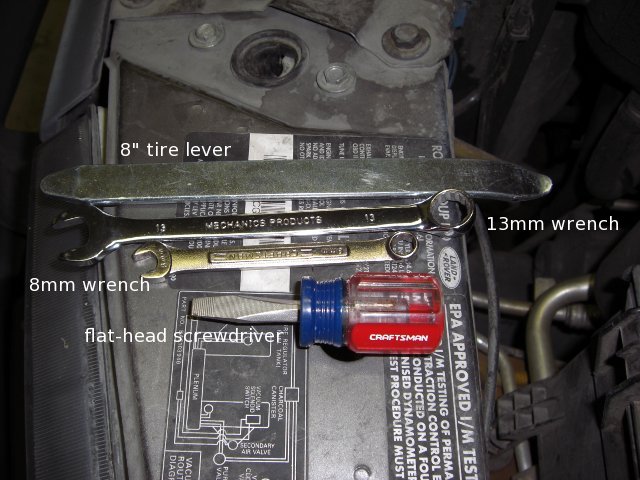
- 8" tire lever
- 13mm wrench
- 8mm wrench
- flat-head slotted screwdriver
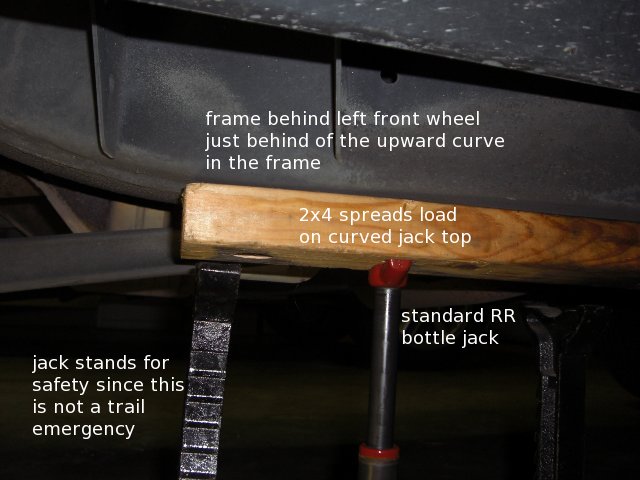
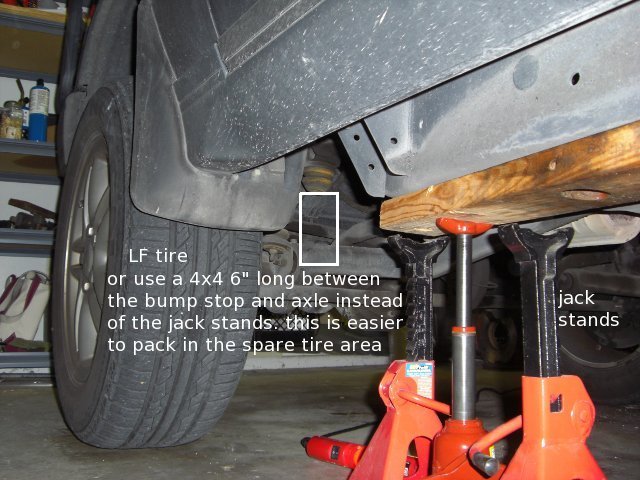
Raise the vehicle as much as possible using EAS or the manual jumper method. Then jack up the chassis as much as possible at the corner of the spring needing replacement. I used the vehicle's LR RR bottle jack with a 2x4 piece of wood to spread the load from the flat frame to the curved jack top. The tips of the jack top will dig into the 2x4 and prevent it from sliding. I jacked on the frame behind the front wheel just behind where the frame curves upward. I used jack stands for safety since I was in my garage and not on a trail making an emergency repair, but you could also use a 4x4 piece of wood between the bump stop and the axle. Either of these methods would hold the vehicle up if the jack failed.
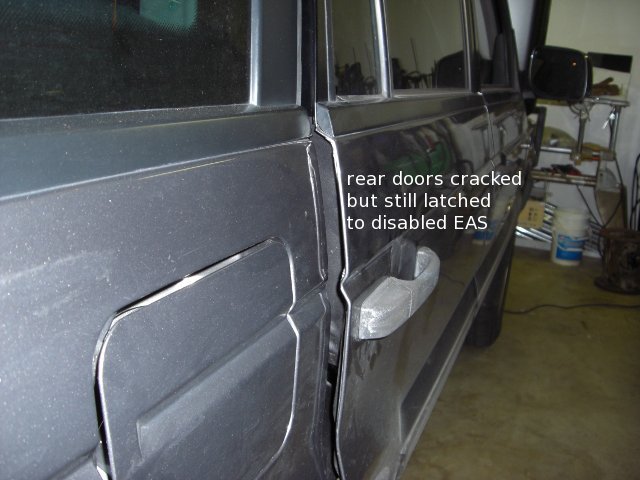
I cracked both rear doors while leaving them latched to disable the EAS. You can also open the tailgate, but open more than one thing for redundancy.
Here are the four tools I used.
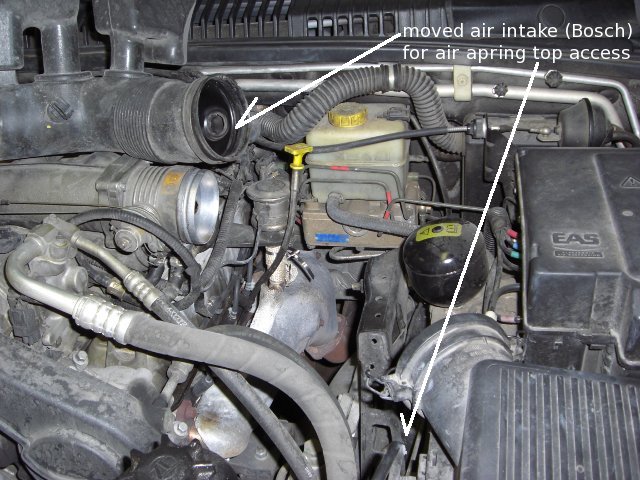
Remove the air intake that connects the air filter to the throttle body for access to the left front spring top. I did not need to remove anything to do the right side. The flat-head slotted screwdriver is for loosening the hose clamp on the air intake at the throttle body.
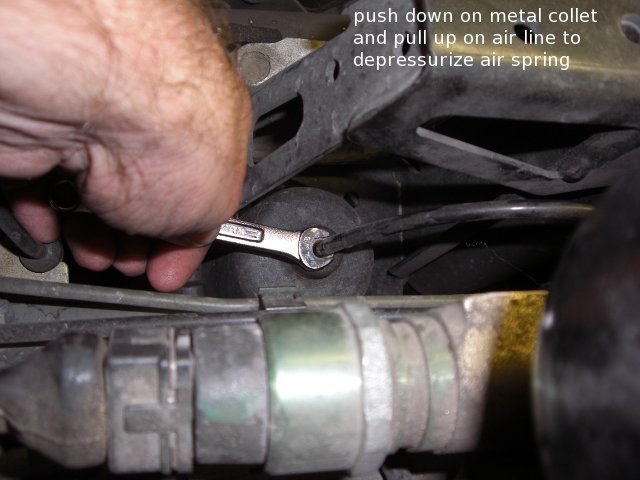
Wear safety glasses. Push down on the metal collet with the 8mm wrench and pull up on the air hose slowly to depressurize the air spring.
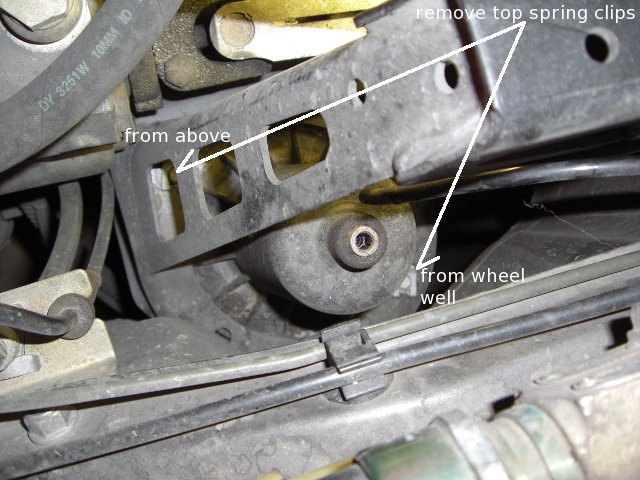
Remove the two top spring clips. Remove one from above and one from the wheel well.

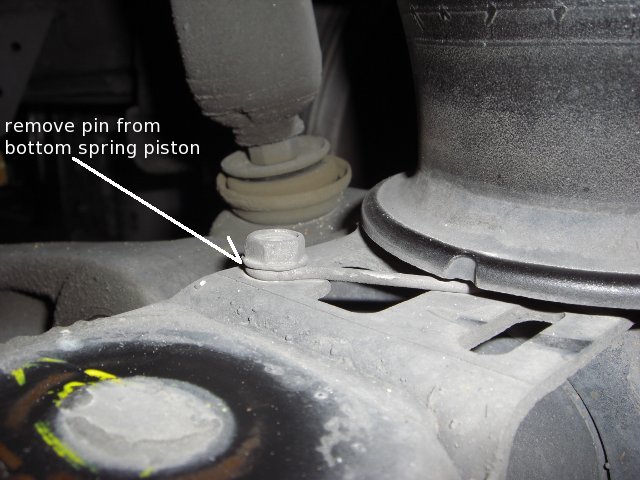
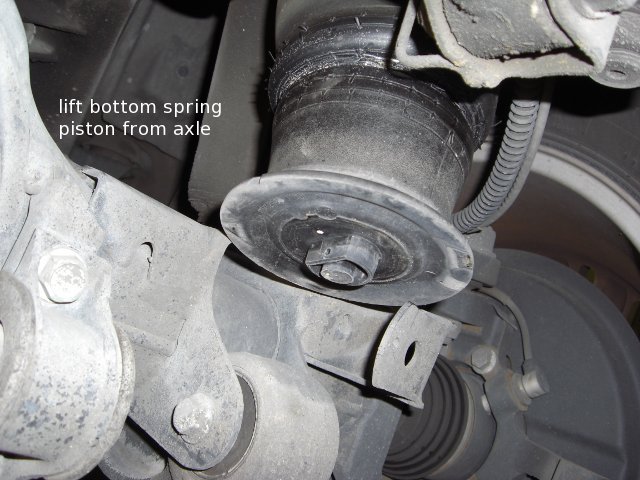
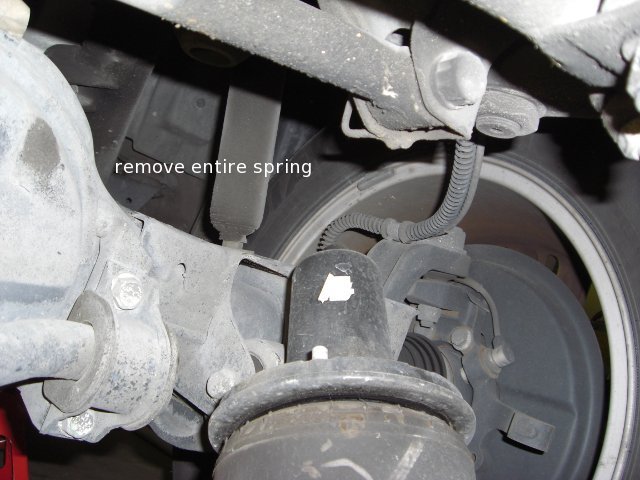
Remove the bottom spring pin with the 13mm wrench and then remove the spring from the vehicle.
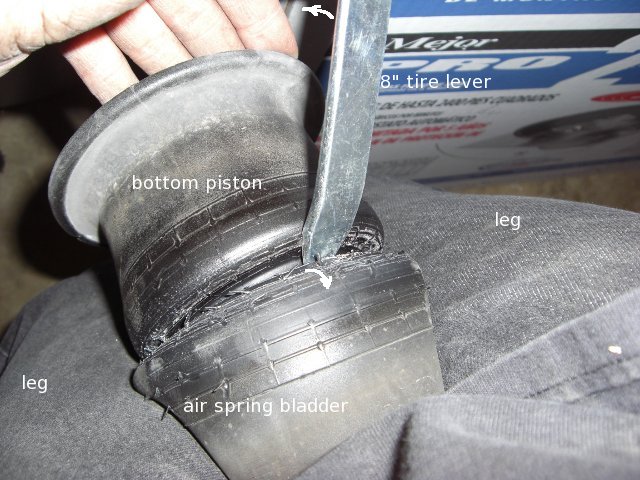
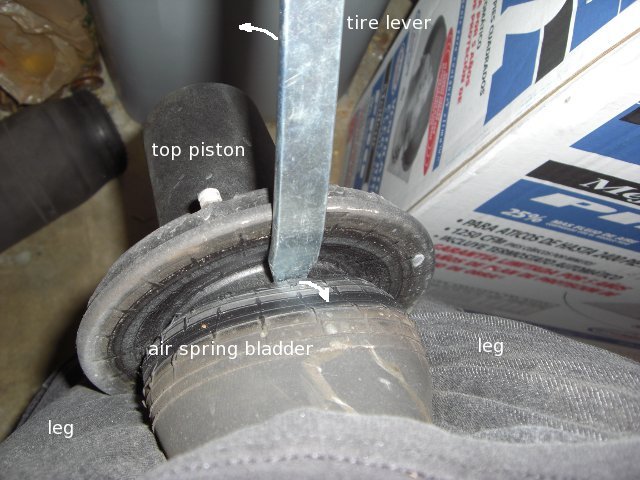
Separate the air spring bladder bead from the air spring bottom piston using the 8" tire lever with the bladder held between your legs. You could use a long flat-head slotted screwdriver for this, but you will probably scratch the plastic piston sealing surface. The tire lever has good angles and smooth edges to prevent scratching.
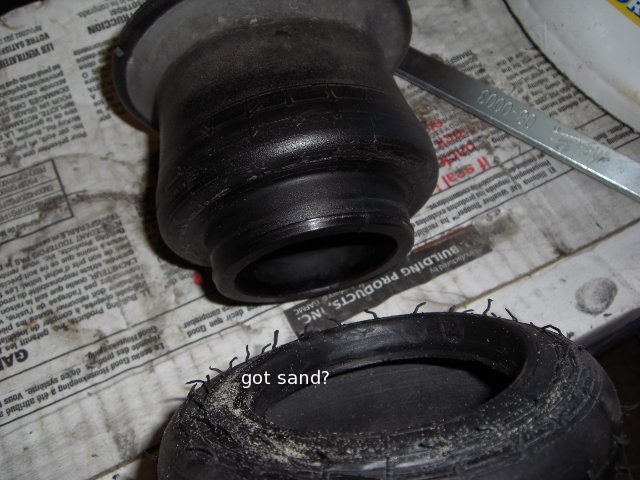
My old air spring bladder rubber was not in terrible condition, but you can clearly see that sand had worked its way up near the bead sealing area. I cleaned up the two old front bladders and kept them for backups next to the spare tire.
Separate the bladder and top spring piston using the same technique.
Inspect the replacement bladder for problems and make sure the bead area is clean.

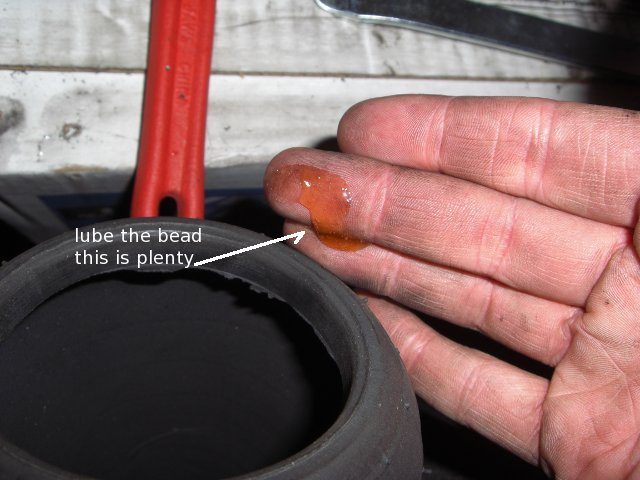
I used dish soap to lubricate the new bead, but saliva or mucus may work. You do not need much.

Fit the new air bladder onto the spring pistons, but make sure to properly align the top spring piston locating pins and the bottom spring piston locating D protrusion. Notice that the new bladder is a good bit longer than the old stretched out one. I also took this opportunity to remove, clean, inspect, and re-Vaseline the o-rings in the top spring piston to alleviate air line connection concerns.

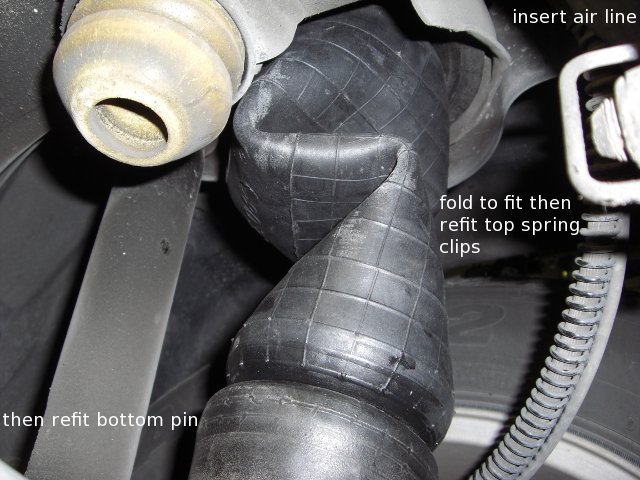
Install the spring assembly back into the vehicle. Turn it so the top spring piston locating pins enter the holes in the bracket. Then fold the bag into an S shape and seat the bottom spring piston into the D hole in the axle. If you need to align the D better and you used enough lubrication, you can turn the bottom piston some and it will slide in the bladder. Then attach the top spring clips, bottom pin, and air line.
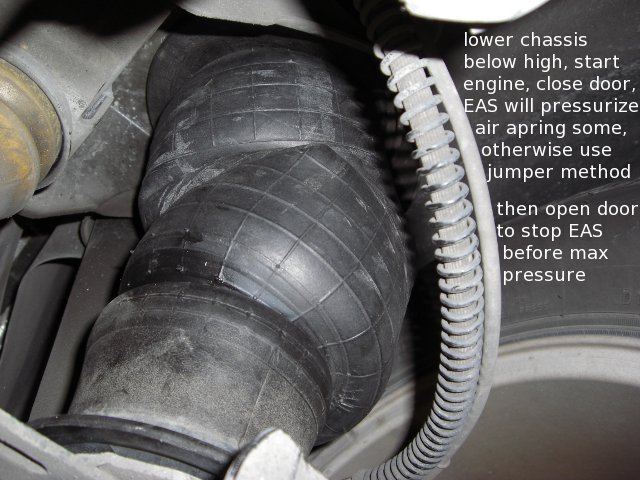
Lower the chassis using the jack so the new spring corner is below the high setting of the rest of the air springs. This will allow EAS to pressurize the new air spring hopefully without altering the height of any other corner. Start the engine and close any open doors to activate the EAS. If your EAS has faulted, clear the fault or use the manual jumper method. Stop the EAS after a few seconds by opening a door and check that the bladder is partially inflated and has pressure. You do not want to put too much pressure on the kinks and folds of the improperly compressed bladder if you can avoid it. This step was just to get some pressure into the spring and keep sealing pressure on the beads.
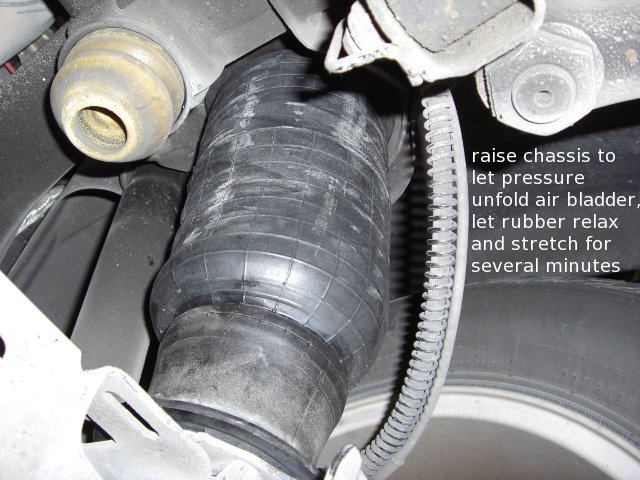
Raise the chassis again using the jack to maximum extension. This allows the internal pressure to unfold and unkink the bladder. Let it sit for a few minutes to stretch and relax the new rubber.
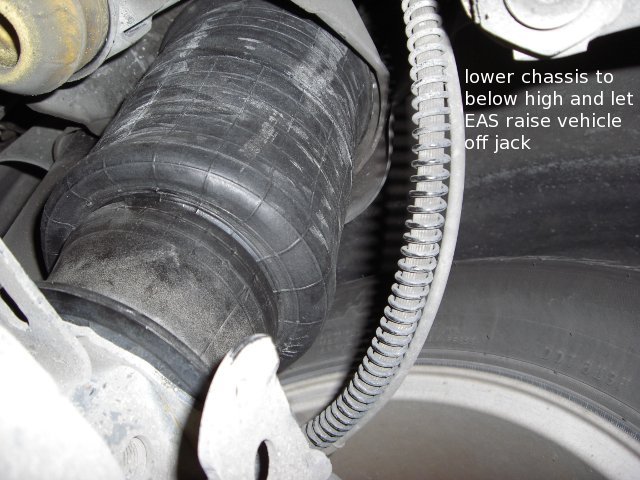
Lower the chassis corner again to below the high level. Let EAS raise the chassis off of the jack. You can see that the bladder is starting to roll over itself properly here in high mode. Finally, lower the ride height to normal to make sure the bladder rolls over itself properly at that height.
So, 30 minutes in the garage or on a trail with minimal tools and you can have a new air spring installed. I definitely would not take the time to remove wheels, wheel arch/well liners, or mess with more than one jack. This one-jack procedure was too easy to bother trying something else.