DC TIG Welding Aluminum With Argon and Flux
Introduction
First Test Beads
Stacking Beads Drill
Beveled 1/8" Butt Joint
Beveled 1/4" Butt Joint
Soda Cans
Conclusions
Introduction
I fully acknowledge that AC TIG, DCEN TIG with helium, and spool gun MIG are all superior processes for most aluminum welding situations. I am not a professional weldor, I do not currently have access to one of the preferred processes, and I am not willing to invest in another welder or another gas cylinder at the moment. I have a Lincoln Invertec V275-S DC stick/TIG welder, I have an argon cylinder, and I'm curious. DCEP TIG with argon can weld aluminum, but it provides shallow penetration, it requires oversize tungsten, and the arc is difficult to control. Flux makes oxy-fuel welding aluminum and stick welding aluminum possible. I ran some aluminum stick welding electrodes DCEP with this welder, but I'd like to see if I can achieve more control and a cleaner weld. This page focuses on welding aluminum with a DC TIG welder, electrode negative (DCEN), argon, and flux. The argon cools the TIG torch, shields the tungsten, and stabilizes the arc. DCEN should provide good penetration. The flux cleans oxides from the aluminum and it helps shield the molten puddle. For my testing, I used TM Technologies Premium Aluminum Gas Welding Flux. It's designed primarily for oxy-fuel welding aluminum, but TIG is also mentioned on the product page. I haven't had a chance to try the Forney 37025 Alum-A-Flux yet. You can use this process with scratch start, touch start / lift arc start, or high-frequency start DC TIG.
This page, A short history of welding aluminum, has an excellent overview of the various aluminum welding processes. It does a good job of explaining some of the difficulties and potential problems with flux in OFW and SMAW aluminum welding. The flux discussion is also relevant here.
I mixed up a 2:1 flux:water very thin paste in a glass jar. The flux is very corrosive, so use glass or plastic to store it. Metal containers are not recommended. Before this, I tried DC TIG with a stick welding aluminum electrode. That worked, but the large electrode size and huge amount of flux made things difficult. You have a lot more control and visibility with a conventional TIG rod and thinly applied flux. I used an old toothbrush to brush the flux on the area to be welded.

First Test Beads
Here's a shot of the very thin flux application. I used an old AC TIG test piece. You can see the back side of another weld and some base metal cracks under the flux.
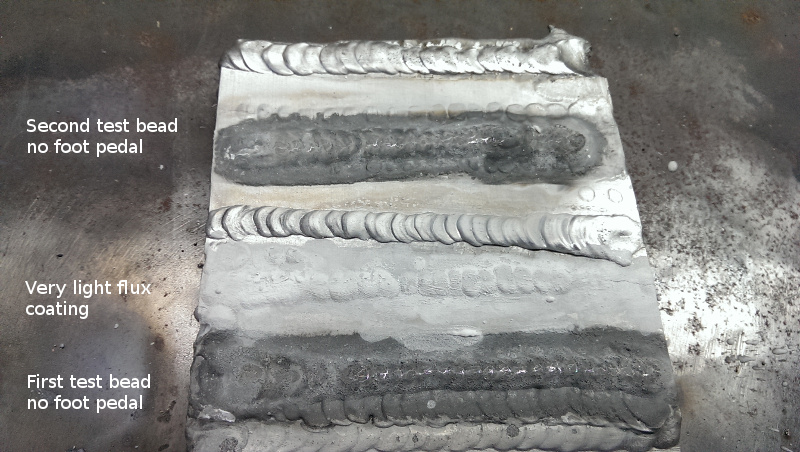
It takes a little practice to see the molten puddle under the glowing flux. After welding, the flux is discolored and pretty tenacious.
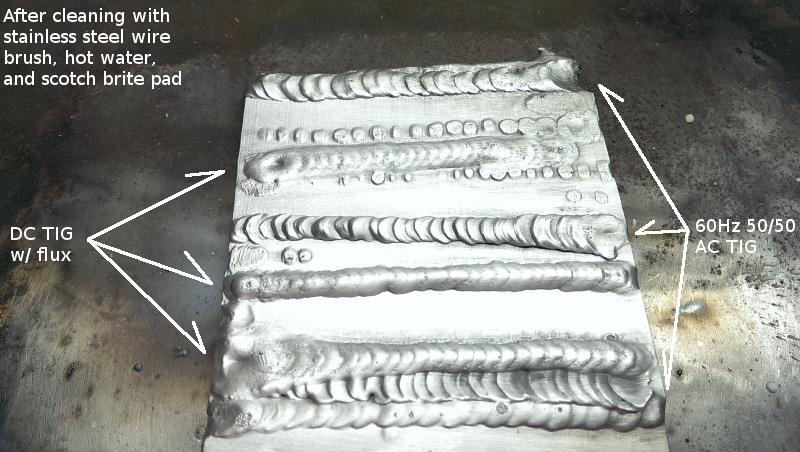
I started cleaning with hot water and a scotch brite pad. I finished up with a stainless steel wire brush. A dedicated stainless steel wire brush in a drill or grinder might be a good approach for an initial cleaning pass.
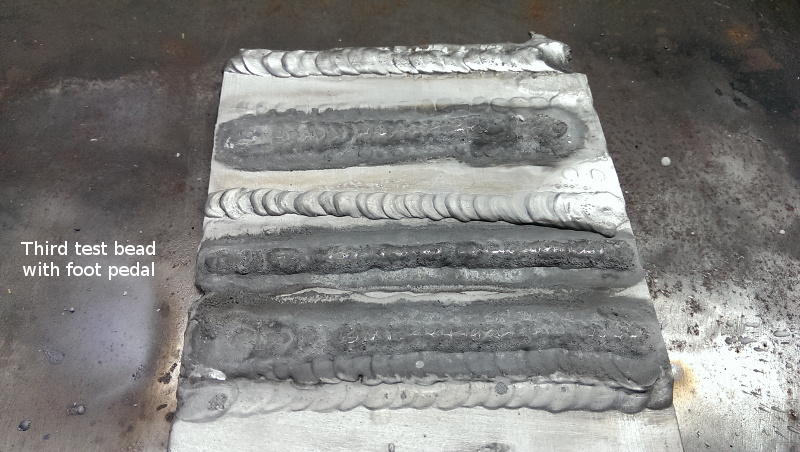
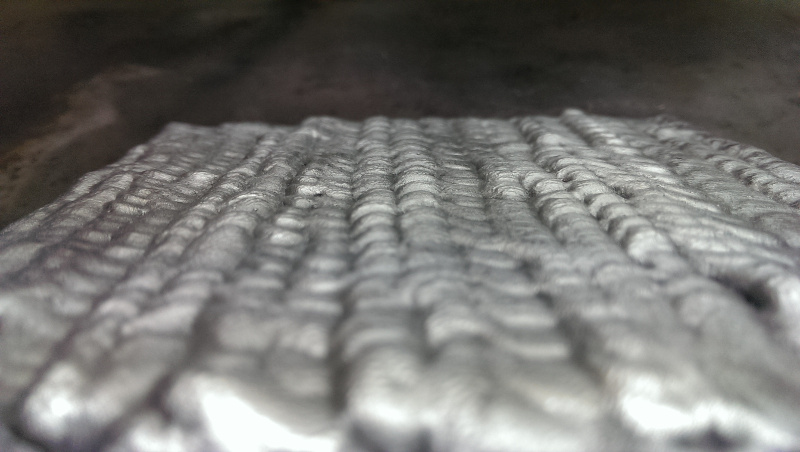
The three beads above are literally my first three beads with this process. This process is ugly and cleaning intensive, but it works. The plate was 1/8" 6061 with stacked AC TIG beads covering the entire back side. I used a 3/32" 4043 TIG rod and 125A with and without a foot pedal. Be sure to clean any stray flux off your steel welding table afterward since it will accelerate rusting. Now it's time for a new test plate and more practice.
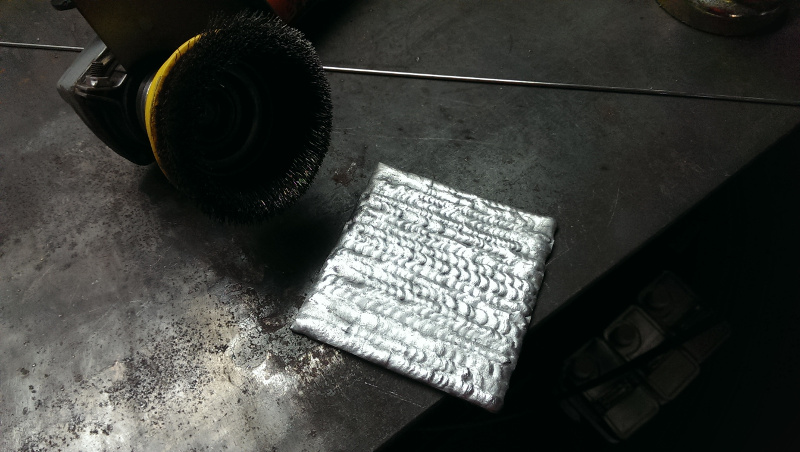
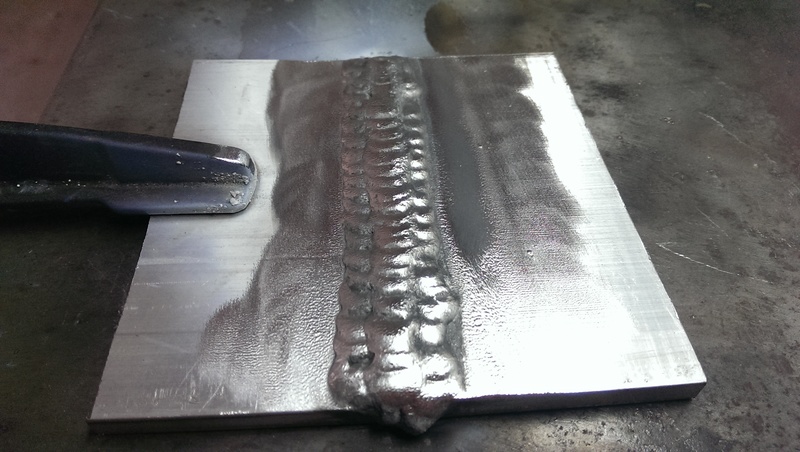
Stacking Beads Drill
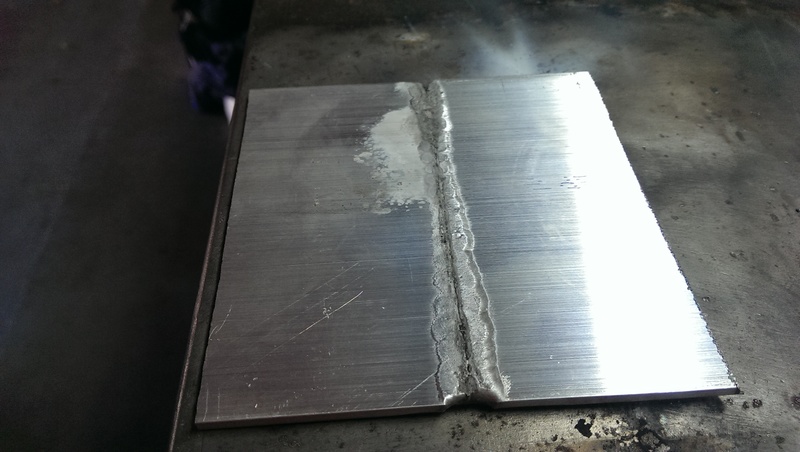
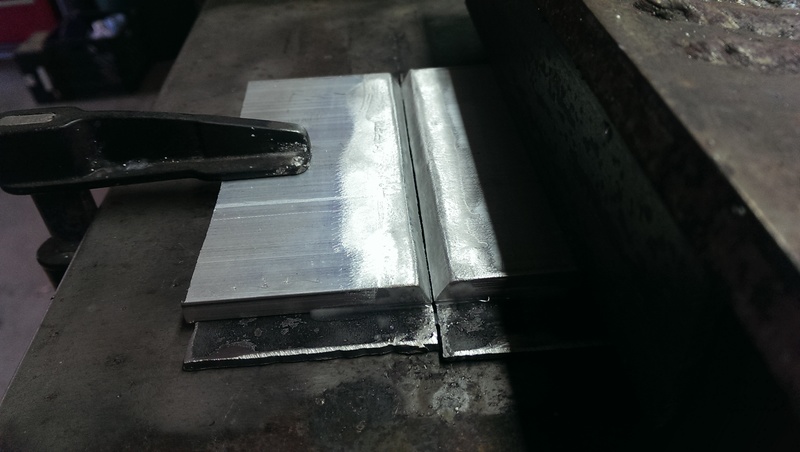
I cut a 4x4x1/8" aluminum plate, cleaned it with acetone, and brushed it with a stainless steel brush. I applied a very thin amount of flux before each bead and partially overlapped beads. I cleaned the flux with a stainless steel wire brush on my angle grinder after each pass. A power brush like that really speeds things up, but it dulls the weld bead appearance and reduces ripple definition. Weld seemed to flow and tie in pretty well. It can be difficult to scratch start or touch/lift start at low current when the flux is still wet. I had no problems lighting up on air-dried flux, propane-heat-dried flux, or bare metal next to wet flux.
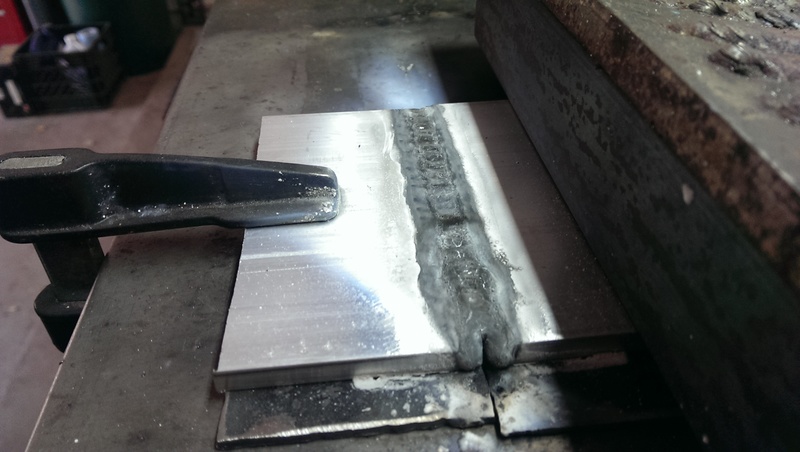
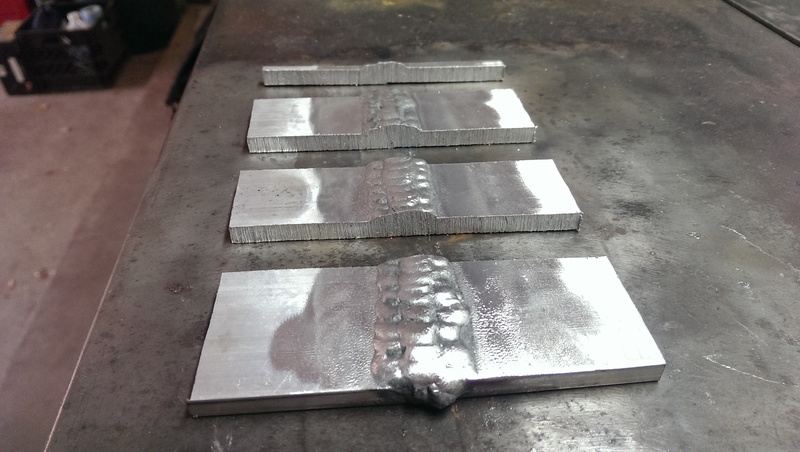
Beveled 1/8" Butt Joint
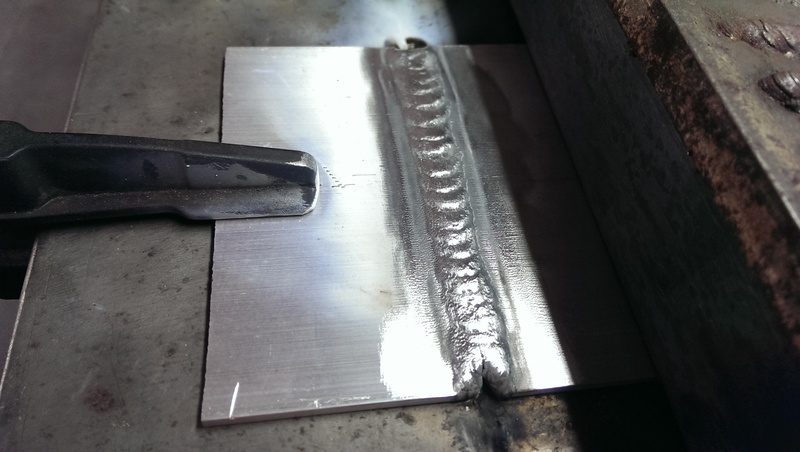
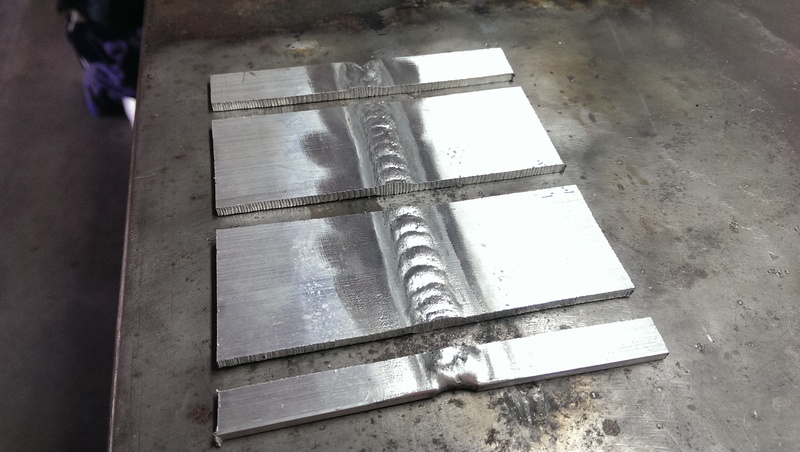
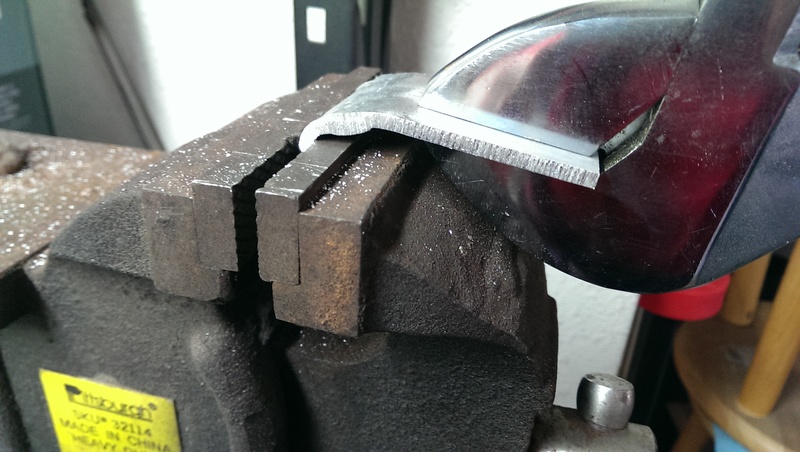
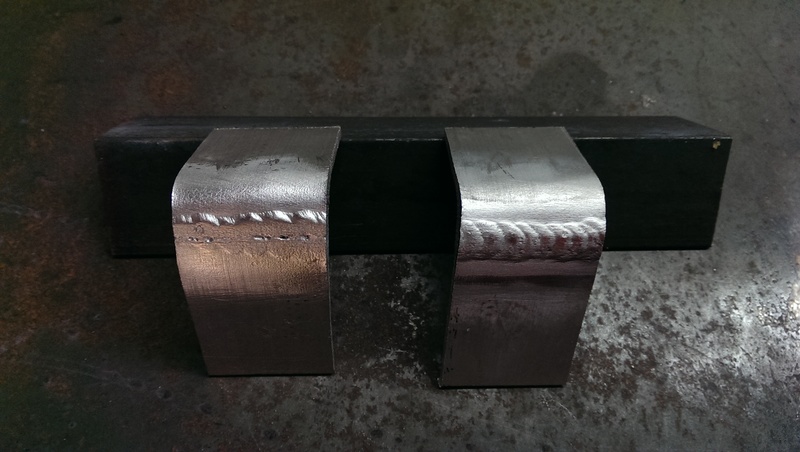
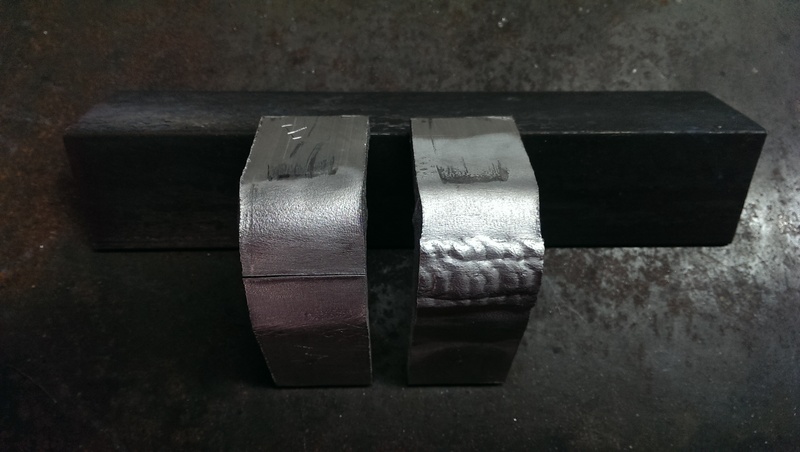
Next I tried a butt joint with two 4x2x1/8" plates and a 60 degree total bevel. I cleaned with the power brush and lightly fluxed the bevel and the face. The table behind the weld had no groove. I used 150A DCEN with a foot pedal. The flux allowed good weld metal to base metal fusion and it allowed good base metal to base metal fusion. With enough heat, the base metal flowed into the bevel and tied together. As that happened, I added filler rod. I cleaned up with the power brush and cut two test pieces. I clamped each test piece in my vise right against the edge of the weld bead and bent them with an adjustable wrench. Both the face bend and the root bend proved to be strong. There was no visible cracking. This vise-wrench bend test is not as good as a proper machined wrap-around bend test for aluminum, as specified in AWS D1.2, but I'm happy with the results.

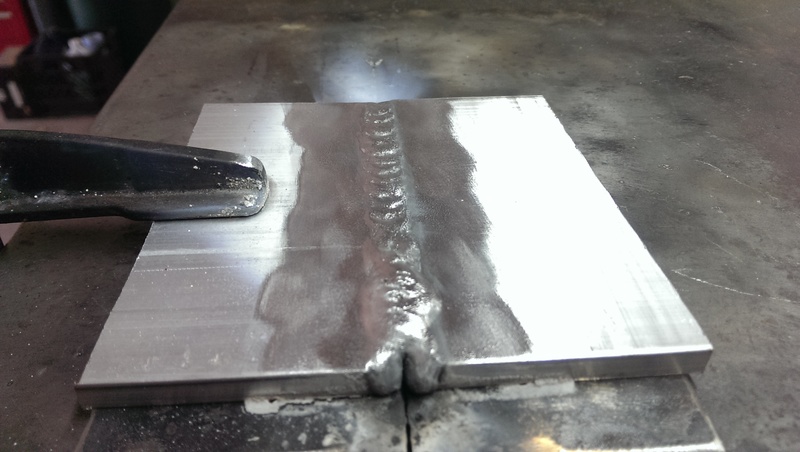
Beveled 1/4" Butt Joint
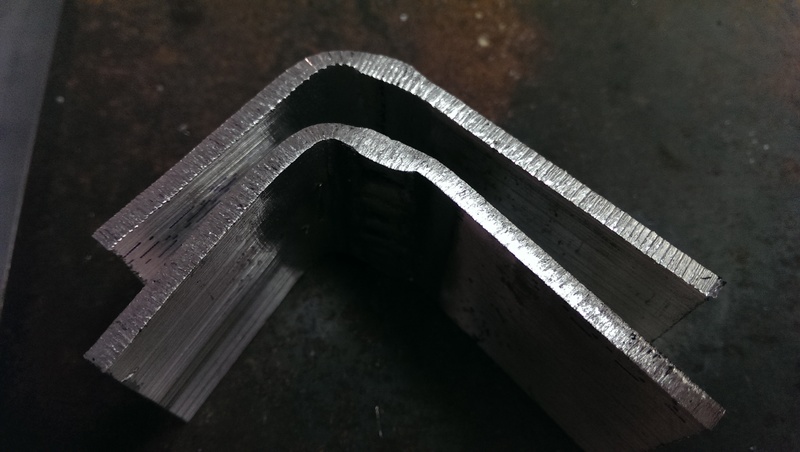
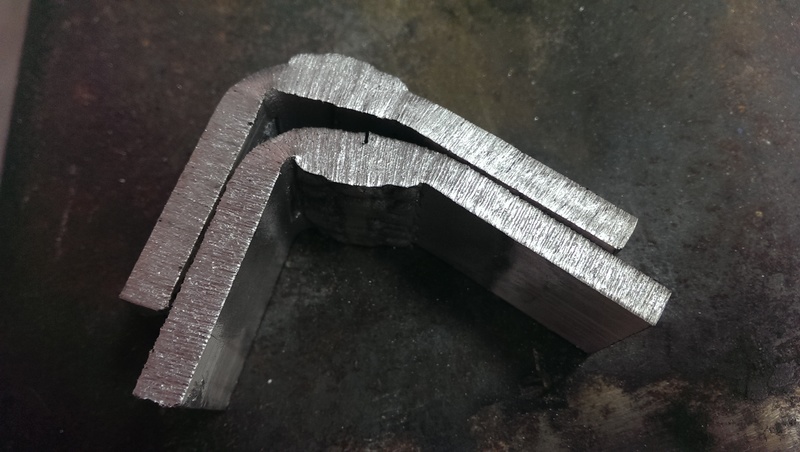
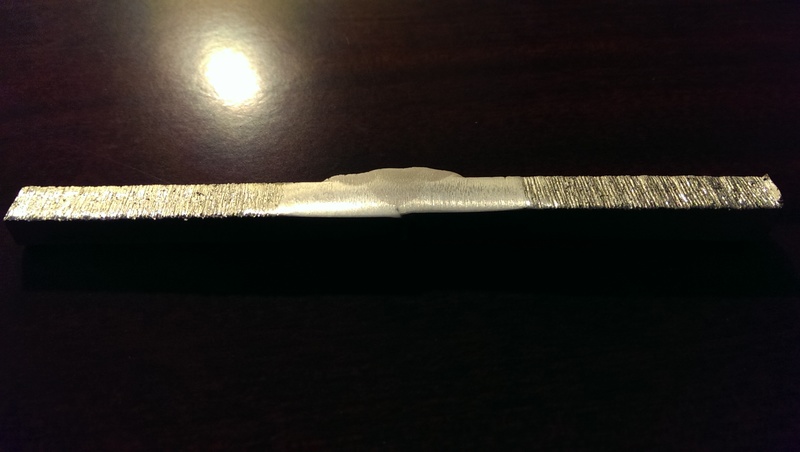
Next I tried a butt joint with two 4x2x1/4" plates and a 60 degree total bevel. My TIG torch is a 150A torch, so I was limited by that. I proceeded similar to the 1/8" plate, but I made 4 passes. My initial pass was not quite sufficient. It was not proud of the base metal, so I stacked a couple beads on top. My vise-wrench bend test showed the joint to be strong in both directions, but you can see my root pass did not achieve complete penetration. A bigger bevel, a root gap, or higher current may have allowed complete penetration. More practice and better technique on my part would help as well. I sanded an edge of the weld in stages and etched with naval jelly (phosphoric acid). This type of aluminum etching is very difficult to photograph, but I got a decent shot. You can see the stacked beads tied in together and into the base metal nicely. There was no visible porosity or slag inclusion under 10x magnification.
Soda Cans
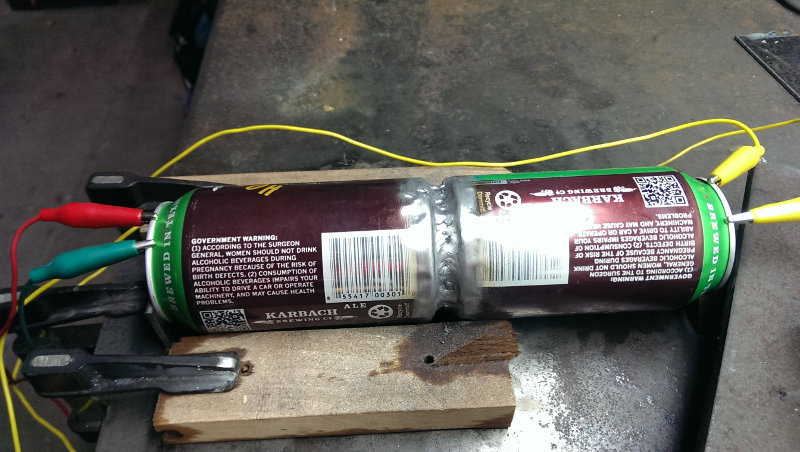
Next I tried welding two aluminum soda cans together. This was my first time trying this with any process, but I imagine it's easier with AC TIG and high frequency start. That being said, it is possible to weld soda cans together with this process even though I didn't exactly lay a stack of dimes down in there. The photo is of the better side and I definitely blew a couple holes in the far side. I had lots of restarts and I could certainly use some more practice.
Conclusions
This process works a lot better than I expected, but it still has some obvious drawbacks. I can make strong welds with half-decent appearance (as in half way between SMAW and AC TIG). Cleanup effort is minimal with very light flux application and a power brush. The molten puddle is more difficult to see than AC TIG, but a lot easier than SMAW. Like many other things, poor technique yields poor results. Bad fit up, joint preparation, or TIG technique could result in trapped slag, slag inclusion, or porosity. You might need to get creative if you can't mechanically clean flux off the back of the weld. I think hot water or some sort of mild acid bath might be needed in that case. For example, it would be difficult to mechanically clean the inside of a tube-tube joint, tube-plate joint, or the last joint of a tank. Drawbacks aside, this process allowed me to make some very effective aluminum welds using the DC welding equipment and shielding gas I already have, which I'm very happy about. For the amount and type of aluminum welding I want to do, I think this process will be very useful and cost effective.